Connect the MiniMate Plus Battery
The MiniMate Plus battery may be disconnected to conserve battery life. It is important to note that the MiniMate will turn on if plugged in even if the MiniMate Plus battery is disconnected. Before working on any electronics, make sure to discharge any static electricity by touching a piece of metal before working on a ground vibration monitor.
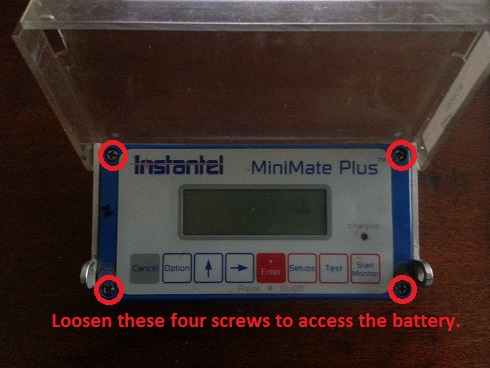
1) To connect the battery, loosen the four screws located on the top of the MiniMate Plus.

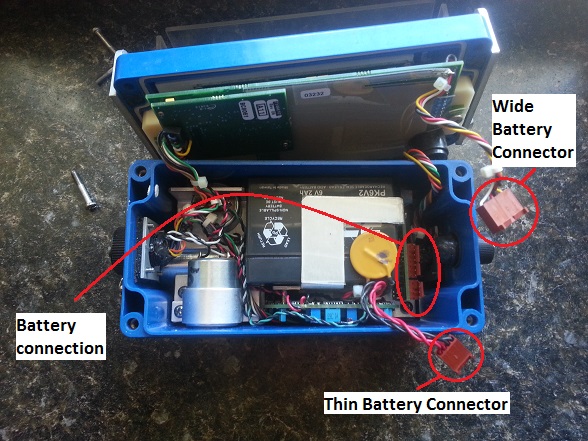
2) Remove the face panel and locate the two brown, battery connections. There will be one thin battery connector and one wide battery connection. In general, only the thin battery connector will be disconnected and need to be plugged in.

3) Plug the wide battery connector into the wide battery port if it is unplugged. Similarly, plug the thin battery connector into the thin battery port. The ground vibration monitor may beep and turn-on when the battery is connected; do not panic.
4) Place the face panel back on top of the ground vibration monitor, making certain that all wires are encapsulated within the unit. Tighten all four screws. WARNING: Do not over tighten screws; they will strip.
Charge the MiniMate Plus Battery
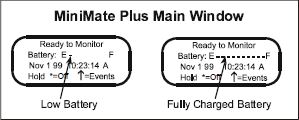
To check the MiniMate Plus battery charge, turn the vibration monitor on and read the battery level displayed in the Main window.

To charge the MiniMate Plus battery, plug the AC adapter into the top connector located on the right–hand side of the MiniMate Plus. Plug the other end into a 120 VAC 60 Hz electrical outlet.
Do not allow the battery to become discharged and left in a discharged state for an extended period of time. Allowing the battery to become discharged may cause permanent damage to the battery