Install the Blastmate III Fuse after it…
comes back from the manufacturer.
has been stored for a long period of time.
has been through an electrical surge that blows the fuse.
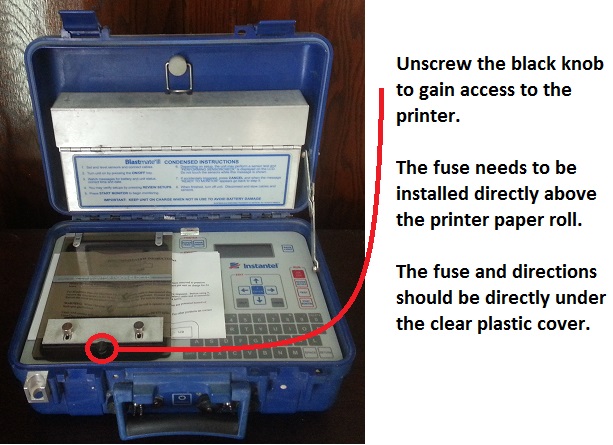
1) Open the Blastmate III, and locate the black knob
that holds the printer’s clear protective cover. Twist this black knob counter-clockwise to loosen it. Flip the protective cover up so that you have access to the printer.

2) Remove the packing foam
from the printer to access the printer paper roll. There are usually two pieces of foam. One piece of foam holds the printer paper roll in place while another large flat piece of foam lies on top of the entire printer. Read the directions provided and place the Blastmate III fuse in a safe spot.
Locate the metal bar that holds the printer paper roll. You will need to remove the printer paper roll to access the fuse holder.
Slide the metal bar holding the printer paper to somewhere that it will not get in the way. I prefer to just pull it straight forward and roll it against the Blastmate III’s blue case.
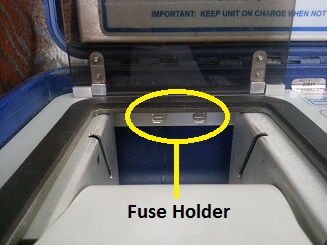
3. Locate the fuse holder
above where the printer paper roll was located.
Snap the fuse into place by holding the fuse directly beneath its holder and gently pushing it into place. The Blastmate III will turn on.
Insert the printer paper roll back into its proper holder.
4. Charge the Blastmate III a minimum of 24 hours before use
after installing the fuse. When charging the Blastmate III, it is important to make certain that the lid of the unit is open to reduce the potential hazard of hydrogen gas buildup.
Before use, the user will have to reset the date and time.
Before shipping, pack the foam into the printer case as it was shipped to you.